ESP32 Temperature Monitor:
Connecting ESP32s to Initial State

Elizabeth Adams | May 12, 2020
Introduction
This article will walk through how to monitor temperature with an ESP32 and DHT22 sensor using Arduino IDE and Initial State.
Things Used
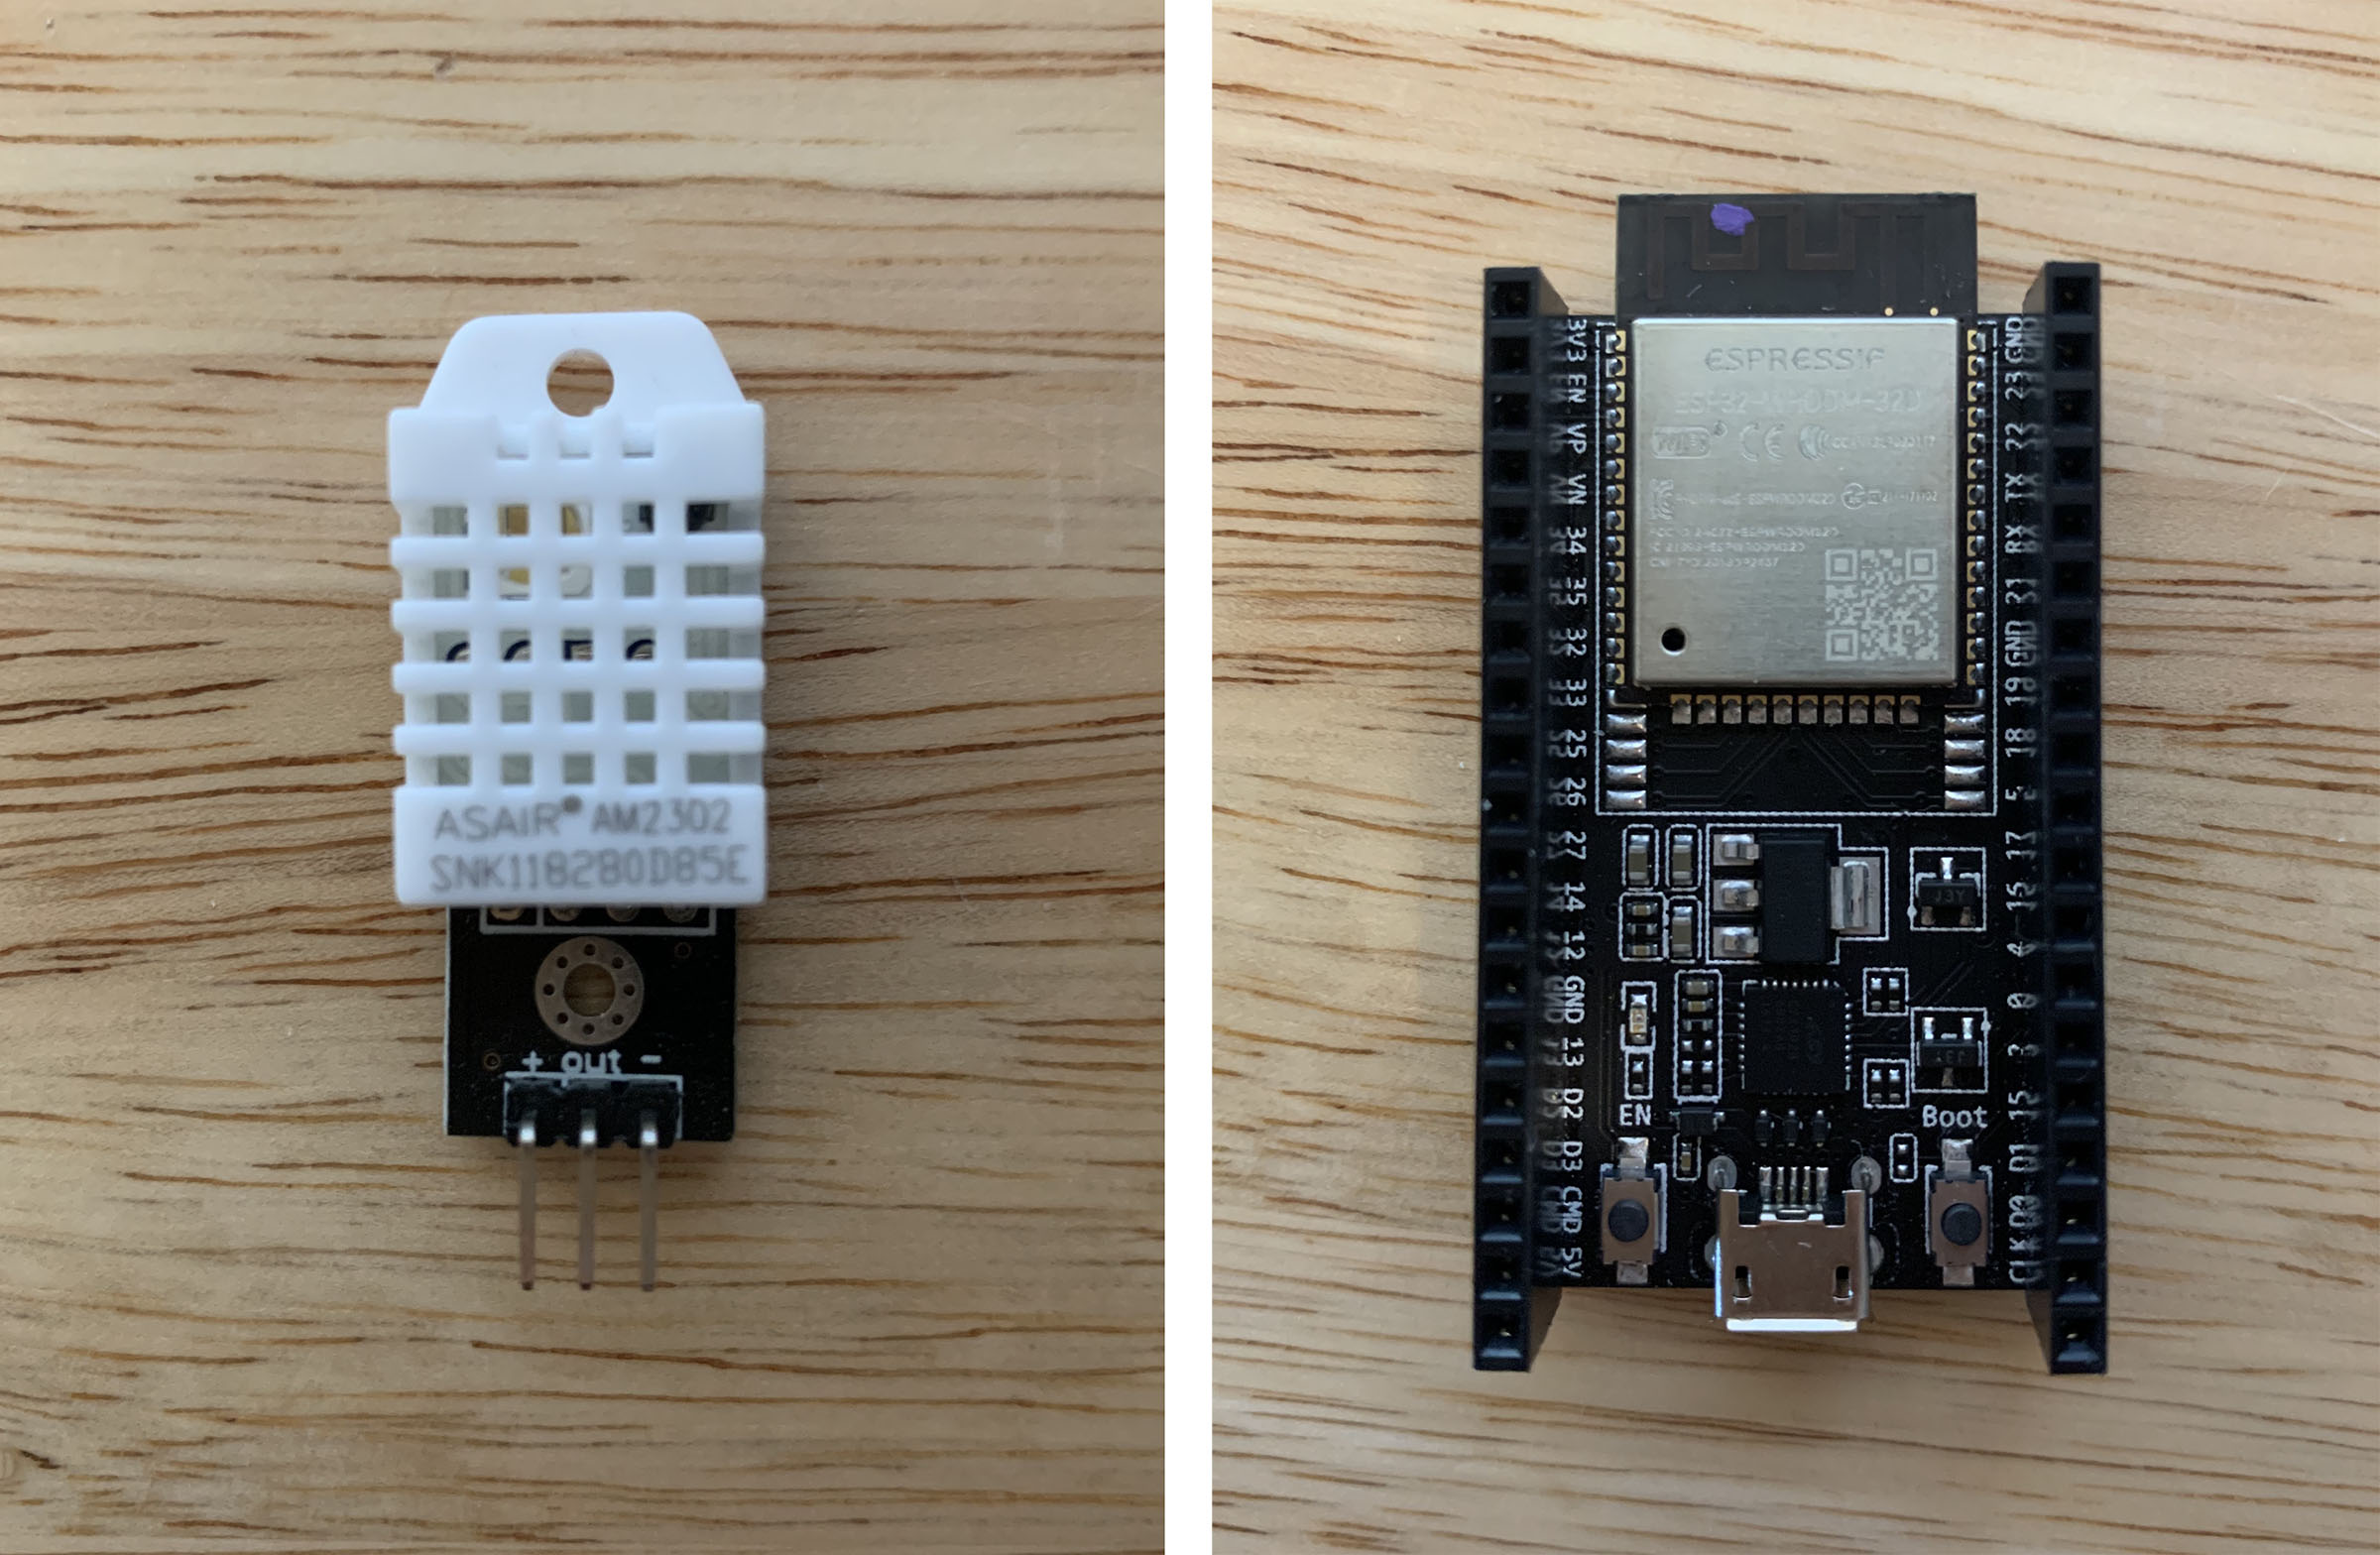
- DHT22 Temperature, Humidity, and Pressure Sensor
- ESP32
- Initial State
- Arduino IDE
Overview
Temperature and environmental data is important in today’s industrial world. Monitoring data for server rooms, commercial freezers, and production lines is necessary to keep things running smoothly. There are lots of solutions out there ranging from basic to complex and it can seem overwhelming finding what your business needs and where to start.
In this post, I will walk through how to build a ESP32 temperature sensor system. The ESP32 combined with a DHT22 sensor will send temperature data to a data visualization tool. We have previously posted the comprehensive guide on streaming temperature with a Raspberry Pi and we received multiple requests for a similar tutorial using the ESP32. This temperature and humidity sensor has a temperature accuracy of +/- 0.5 C and a humidity range from 0 to 100 percent. It is simple to wire up and doesn’t require any pull up resistors.
ESP32 and Arduino IDE Setup
You’ll need to connect your ESP32 to your computer and run Arduino IDE to program it. You can start by downloading the Arduino IDE software to your computer. Once it is installed open it up and begin the process of adding your ESP32 board.
Go to Arduino > Preferences > Additional Boards Manager URL and enter the following in the box:
https://dl.espressif.com/dl/package_esp32_index.json
Next, go to Tools > Board > Board Manager…Search ESP32 and click install.
If you’re using a Mac, you may need to install the Silicon Labs USB to UART Bridge VCP Driver to get the ESP32 to connect to your computer. Download the driver, install it on your computer, and give it the necessary permissions to run.
In Arduino IDE go to Tools > Port and select “/dev/cu.SLAB_USBtoART”
Initial State Account
We are going to use Initial State to send data from the ESP32. This will keep a historical log and allow you to view the real-time data. Go to https://iot.app.initialstate.com and create a new account or log into your existing account.
Once your account is set up, go to your settings to find your Initial State Access Key. This will be used later in the code. It will allow for data to be sent to your account.
Hardware Setup
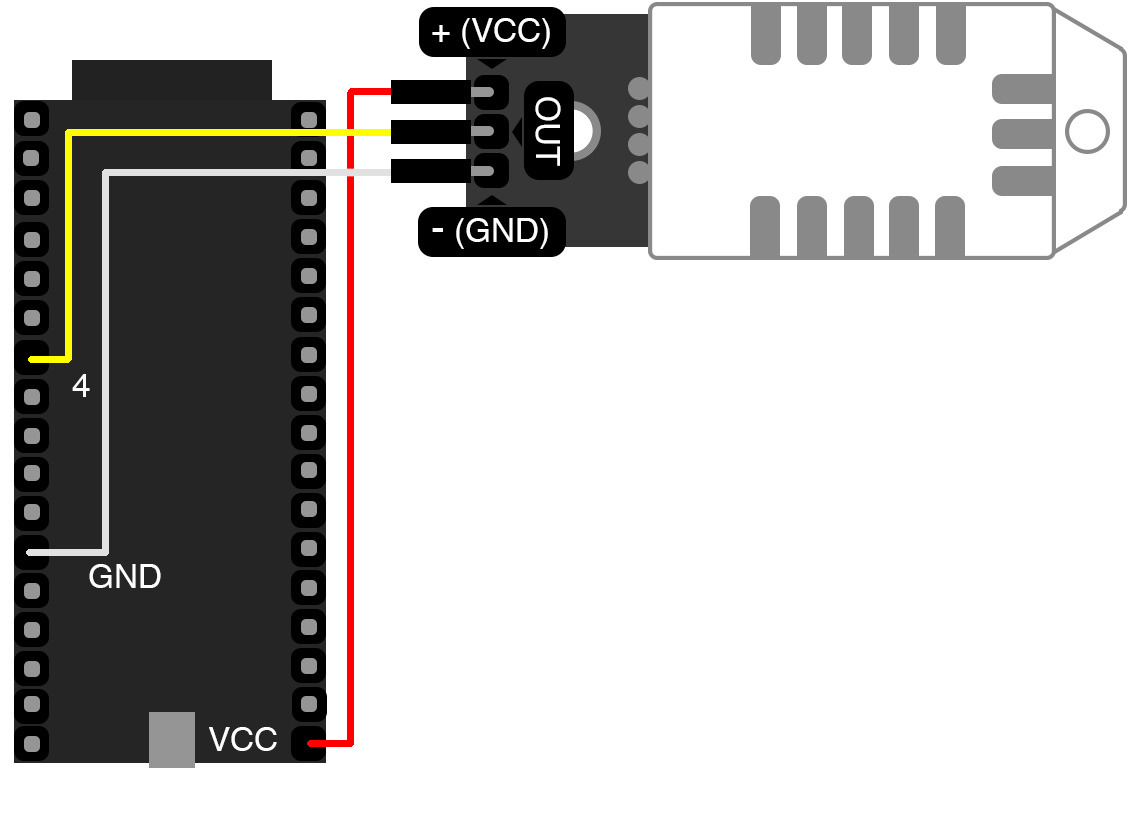
The DHT22 has three pins - 5V, Gnd, and data. There should be a pin label for power on the DHT22 (e.g. ‘+’ or ‘5V’). Connect this to 3V3 on the ESP32. The Gnd pin will be labeled ‘-’ or ‘Gnd’. Connect this to Gnd on the ESP32. The remaining pin on the DHT22 is the data pin and will be labeled ‘out’ or ‘s’ or ‘data’. Connect this to one of the GPIO pins on the ESP32 (I used 4, GPIO32). Once this is wired, power on your ESP32.
Software Libraries
You’ll need to install three Arduino libraries to use the sensor and send data to an IoT dashboard. Open the Arduino IDE, go to Sketch > Include Library > Manage Libraries ...
Search for DHT Sensor Library, HTTPClient, and Adafruit Unified Sensor and install all three libraries.
Code
The link below contains the full code for this project. I’ll walk through the different sections, what can be changed and what you need to know.
https://gist.github.com/elizabethn119/44f43dff9a2e154b4a4ba0119e129e97
DHT Sensor
This section includes the DHT library, defines which pin to read data from, and sets the type of DHT sensor. If you are using a different GPIO from 4 you can change that here.
							#include "DHT.h"

							#define DHTPIN 4

							#define DHTTYPE DHT22

							DHT dht(DHTPIN, DHTTYPE);
#define DHTPIN 4
#define DHTTYPE DHT22
DHT dht(DHTPIN, DHTTYPE);
User Settings
These are the settings you need to change. For ssid put your WiFi name and for password put your WiFi password.
The accesskey and bucketkey are from your Initial State account. Your Initial State access key can be found in your settings. The bucket key can be any characters (ex. dhtsensor1). This will create a new bucket for you based on your access key and bucket key.
Since we will be taking temperature measurements from the DHT22 sensor, signalname will be labeled as temperature.
							//-------- User Settings -----------

							const char* ssid = "SSID NAME";

							const char* password = "WiFi PASSWORD";

							const char* accesskey = "INITIAL STATE ACCESS KEY";

							const char* bucketkey = "INITIAL STATE BUCKET KEY";

							const char* signalname = "temperature";

							//---------------------------------
const char* ssid = "SSID NAME";
const char* password = "WiFi PASSWORD";
const char* accesskey = "INITIAL STATE ACCESS KEY";
const char* bucketkey = "INITIAL STATE BUCKET KEY";
const char* signalname = "temperature";
//---------------------------------
Read Sensor & Send Data
This part of the code will read the DHT temperature and send the temperature value to Initial State.
							 float t = dht.readTemperature(true);

							 String url = "https://groker.init.st/api/events?accessKey=";

							 url += accesskey;

							 url += "&bucketKey=";

							 url += bucketkey;

							 url += "&";

							 url += signalname;

							 url += "=";

							 url += t;

							 Serial.print("*** requesting URL");


							 ask.begin(url); //Specify the URL


							 int httpCode = ask.GET();


							 if (httpCode > 0) {

							      String payload = ask.getString();

							 } else {

							      Serial.print("Error on HTTP request");

							 }

							 ask.end(); //End

							 Serial.print("*** End ");

							 delay(10000);
String url = "https://groker.init.st/api/events?accessKey=";
url += accesskey;
url += "&bucketKey=";
url += bucketkey;
url += "&";
url += signalname;
url += "=";
url += t;
Serial.print("*** requesting URL");
ask.begin(url); //Specify the URL
int httpCode = ask.GET();
if (httpCode > 0) {
String payload = ask.getString();
} else {
Serial.print("Error on HTTP request");
}
ask.end(); //End
Serial.print("*** End ");
delay(10000);
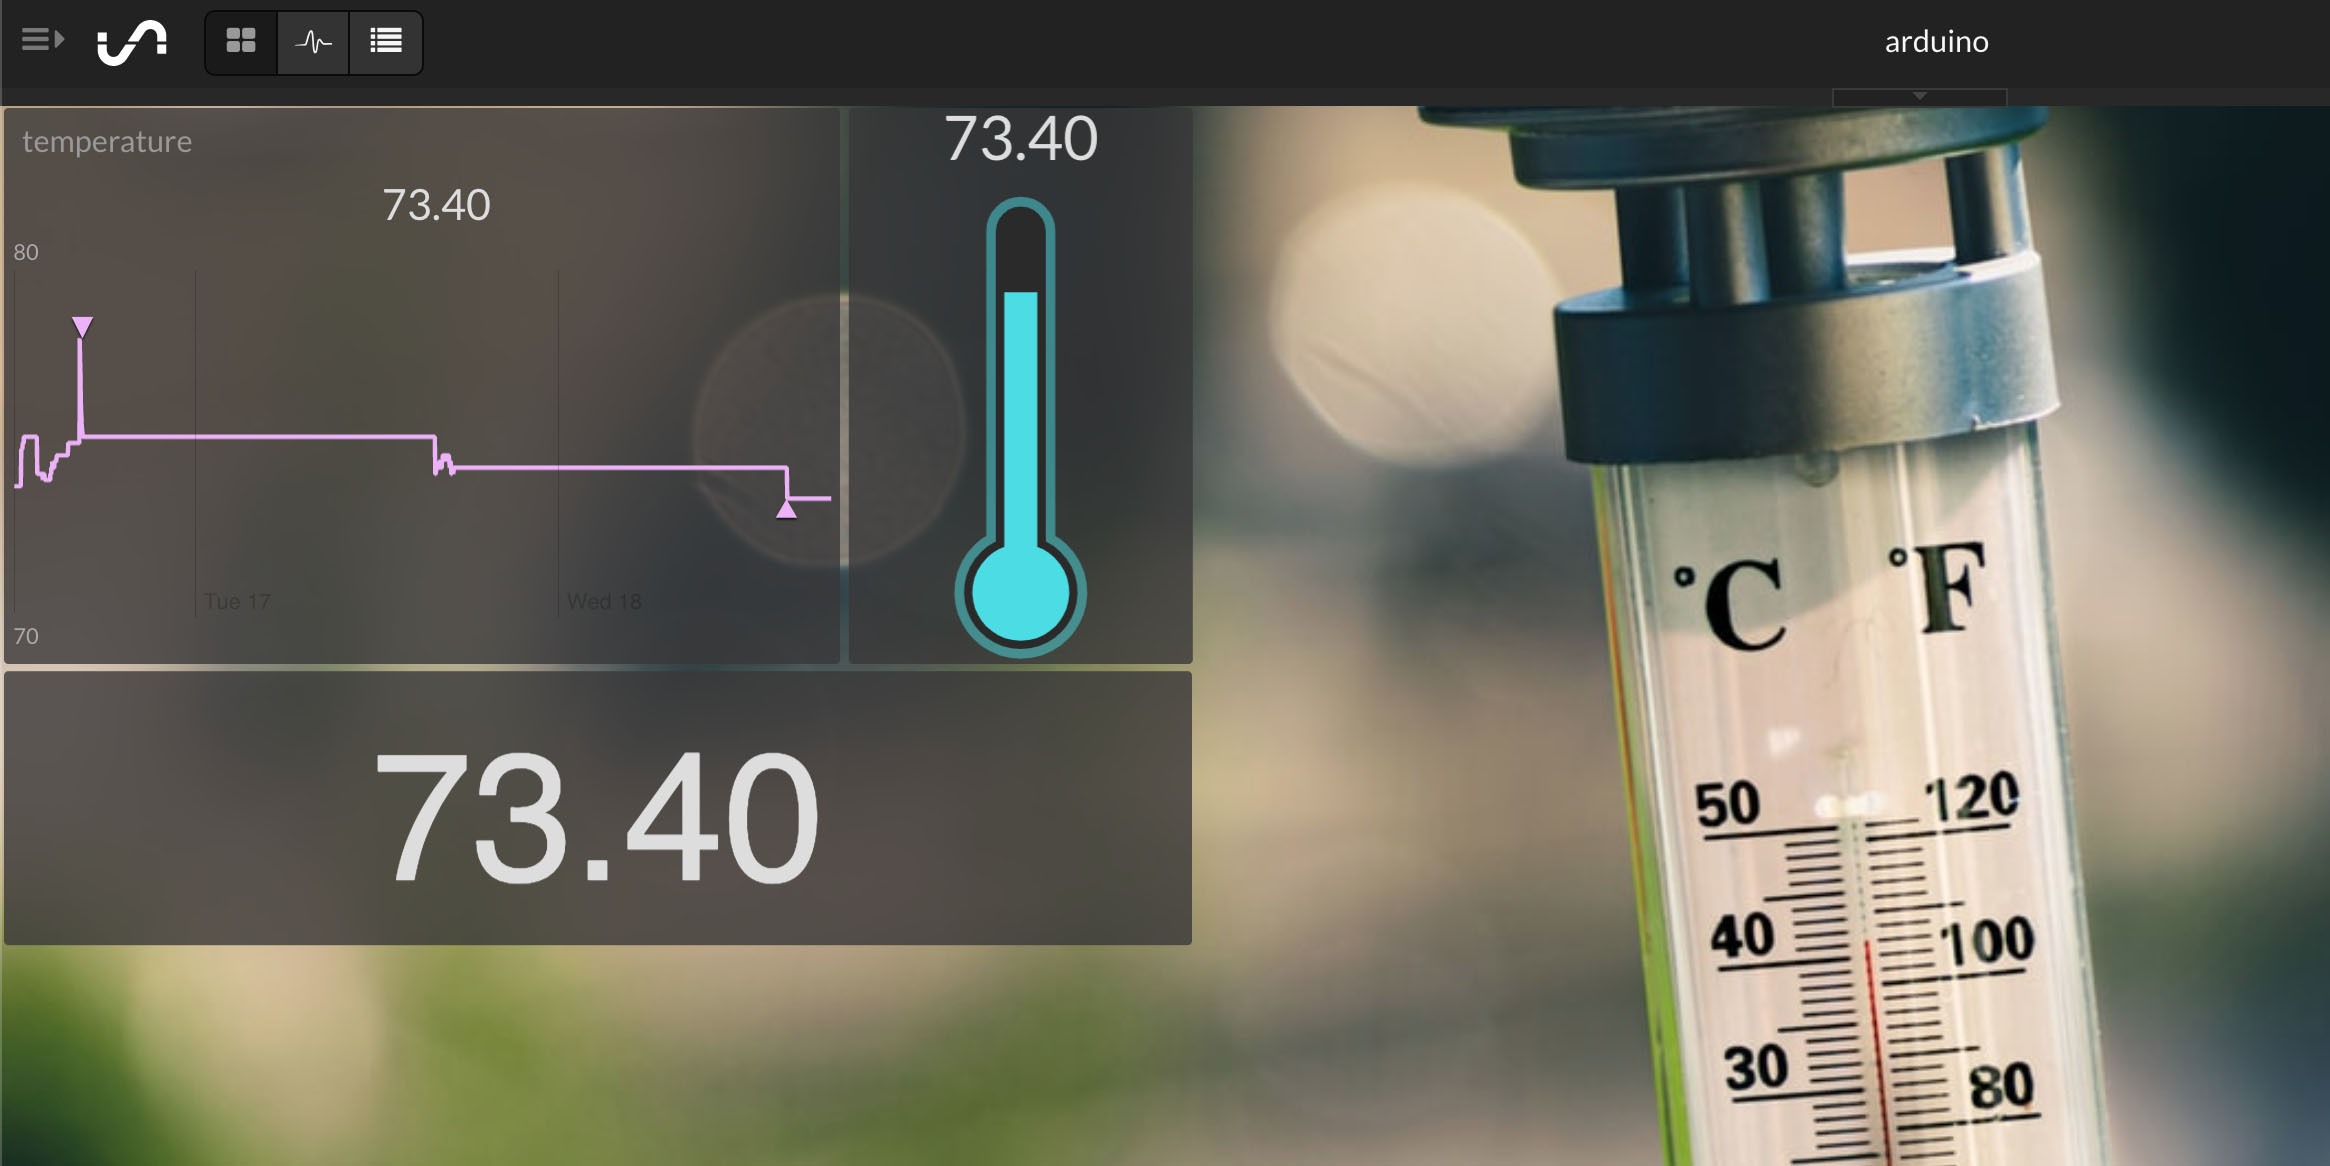
Temperature Dashboard
Now that you’ve built the ESP32 temperature sensor and the code is running, it’s time to look at what data is being sent. Go to your Initial State dashboard to view the temperature data.
At first your dashboard should look something like this.
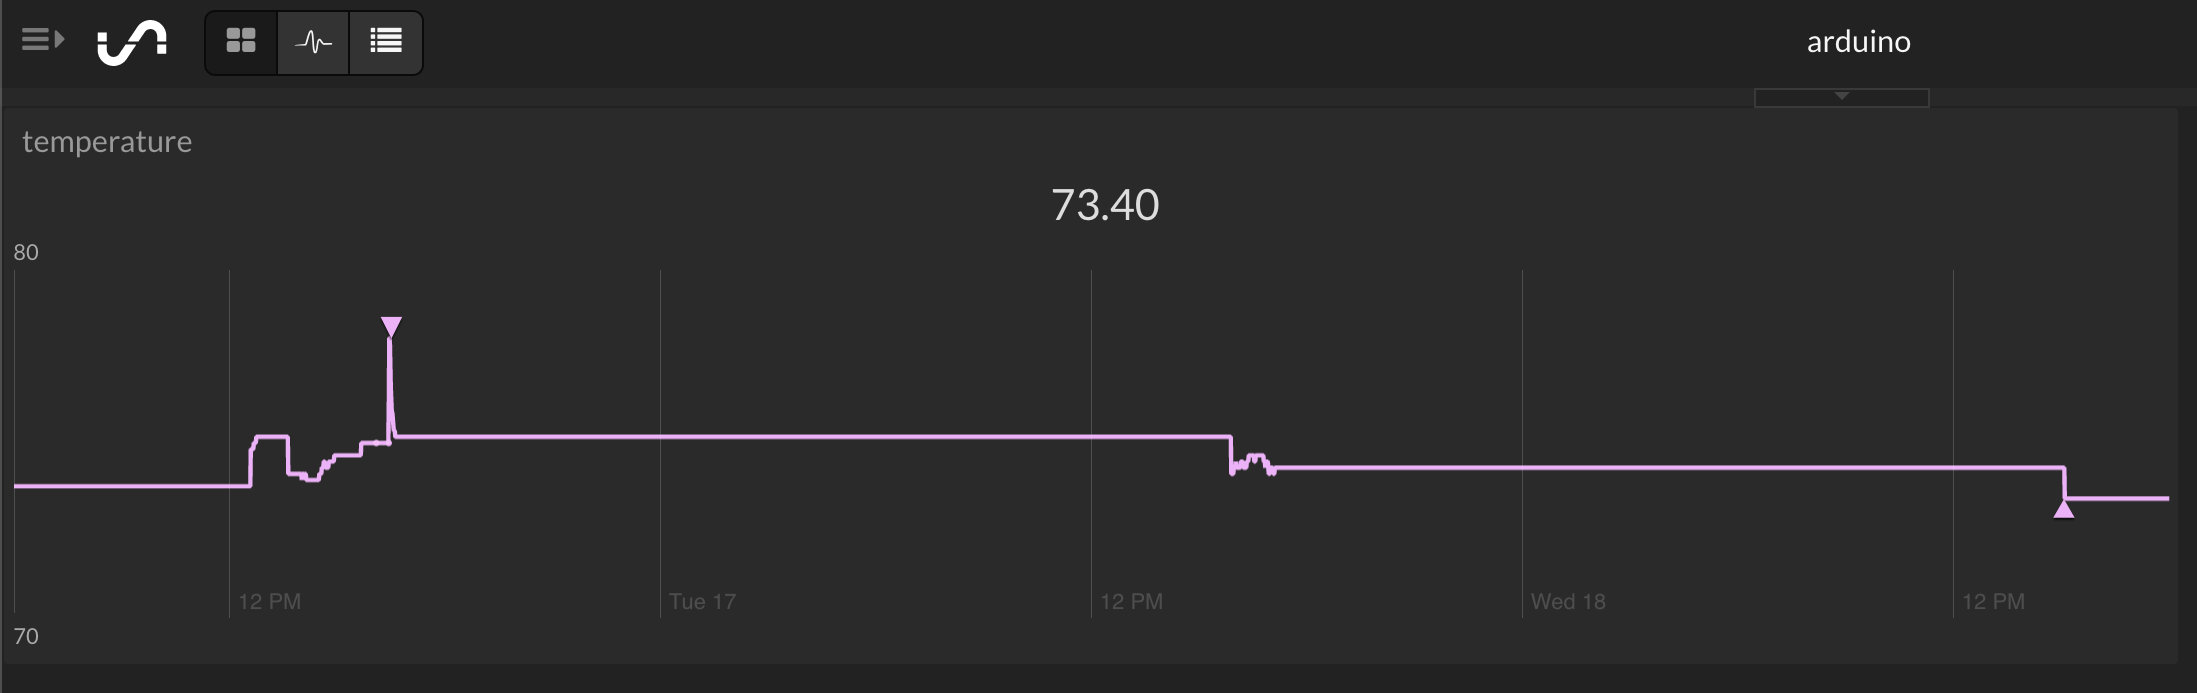
What you have the option to do is change the chart type, add more Tiles, change the background, view the data in Waves, and set a Trigger to alert you when values reach certain thresholds.